Ben Various Breads Wheatley
LEVEL DESIGNER
Theme: Antiquated Future
Curio Collector
2023
Engine
Unreal Engine 5
Game
Curio Collector
Developed For
Epic Mega Jam 2023
Platform
PC
Development Team Size
3
Timeframe
1 week
14/09/23 : 21/09/23
Overview
Curio Collector was created in a week for the Epic Mega Jam 2023. During this project I worked on the world design, lighting and altering art assets to better fit the visual design.
My main focus was creating landmarks that stood out at a distance. Encouraging players to explore distinct locations that all feed into eachother.
I also worked to create our tutorial area that explained the mechanics. These included: Interaction states, keys that open up doors, the vehicle upgrade station, currency and fuel pickups.
Layout Creation
The Implementation:
I turned my quick mockup into a masked material in Unreal. I then used the linework to cast its shadow directly down parellel to the ground plane.
This allowed me to sculpt the landscape as I saw fit, adding bumps and dips, without worrying about the outline intersecting with the floor.
The really nice thing about this approach, is now I'd made a plan and liked the feel of it, I was free to edit and morph sections that didn't feel right. At no point did I feel forced to create the layout exactly to what I'd sketched out, but it gave a great base to work from.
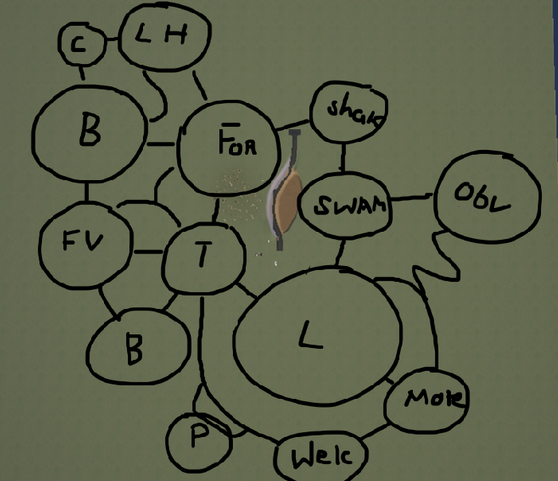
The Plan:
When first experimenting with our driving controller, I spent some time getting a feel for the scale I wanted to make a stretch of road.
With the scale feeling good, I started a rough world design with areas connecting in what I felt to be a believable way.
Locations that could feel distinct from one another, connected by stepping through what could be reasonably believed to be close to one another.
So the FV on the left stood for fishing village, they would be surrounded by Beach (B). Connected to that would be the town (T) that they'd sell their goods at. And further up the beach, could be a lighthouse (LH), that you'd need to go through a forest (For) to reach if coming from the town.
C: Cave L:Lake
B: Beach
LH: Lighthouse
FV: Fishing Village
T: Town
For: Forest
Shak: Shack
Swam: Swamp
Obv: Observatory
Mote: Motel
P: Parking
Welc: Welcome

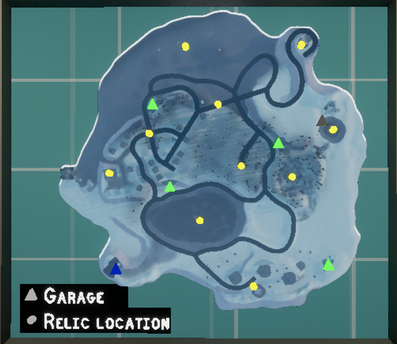
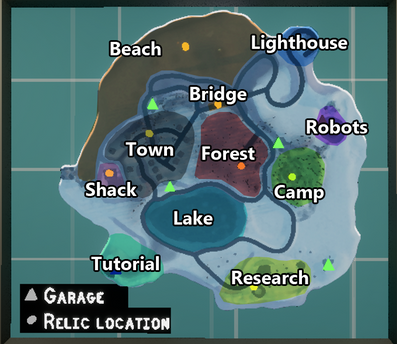
The Final Layout:
This was my final layout.
I kept elements like the Lake, Lighthouse and Forest but I moved the Shack, and replaced the Observatory with the Research Station.
Areas like the Camp and Robots came later when developing sections that were unique but also interesting for the player to stumble onto.
Robots was my favourite to add!
Landmarks
Hover over for more information
Lighthouse
A beacon spinning in the distance on the opposite side of the level. Not always visible while driving, but its consistently bread-crumbed to help orientate the player.
Shack
Moved to provide a contrast between the Town layout by offering a tighter space the player needs to spend more time outside of the car to explore.
Beach
Similar to the Lake, offering clear sightlines so players can easily turn around if they get lost. Structures were added to give smaller beats to help judge distance and gather resources.
Research Station
A replacement for the Observatory. I needed to fill space on the side of the level.
This helped me justify the facility as a whole rather than a lone structure as I had originally planned.
Town
Taller buildings that can be seen from further away. Intentionally positioned to block line of sight between key areas and pinch the players path.
Bridge
The arches in the bridge help frame both the entrance and exit from the forest to the beach, while travelling over it from the town points the player at the lighthouse.
Lake
A flat surface that helps ensure you get a wider view of the whole level.
Doubling as a space to have players get used to the driving.
Forest
A wall of trees that creates a natural barrier for the car. Nothing stops the player driving through, but they suggest a flow that makes the path interesting.
Camp
A bowl to the side of the forest. Initially hard to find, but the path is much clearer when approaching from the other side. Revealing a rundown living area contrasted with the Town.
Robots
This area came together from playing around with props, but it captures what I wanted to create with this gamejam.
A world that leads you to unexpected discoveries, telling a fun story of what came before as you explore.
Tutorial

The Opening Shot:
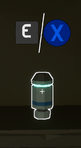
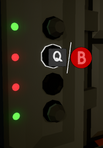
Central to the player's view is a key that has a strobing glow attached to it, as do all of our interactable objects.
The player is locked inside this room until they place the 2 keys into the panel on the wall.
Our interaction UI appears when the player gets close enough and looks at the object.
The room is angled in such a way that the way out, the key to pickup, and a view to the outside are all visible at once.
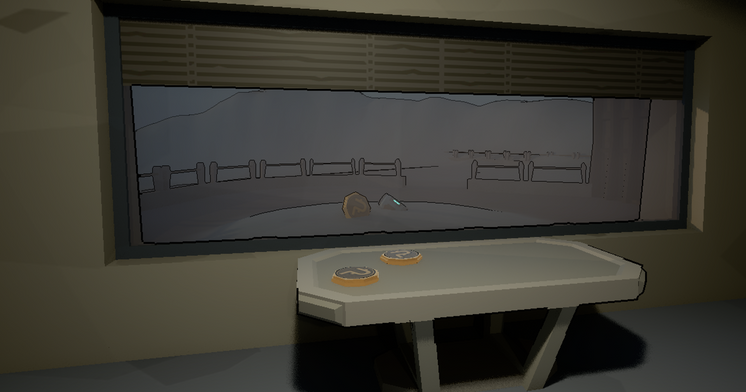
The Window:
If the player walks up to the window, they can pick up two bronze coins. Outside of the window they can see a much larger gold coin stuck out of the snow.
This shows them that these pickups have different values, we used size and a sound cue that deepens depending on amount offered to really sell the coin's value to the player.
They cannot leave through the window or interact with it, so must explore the rest of the room.
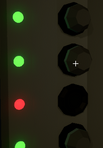
The Door:
The door has two keys already placed into their slots, shown by the green lights. There are two empty slots left to fill.
Once the player picks up the key they can slot it into either, it doesn't matter which. Either way, they still need the extra key to progress.
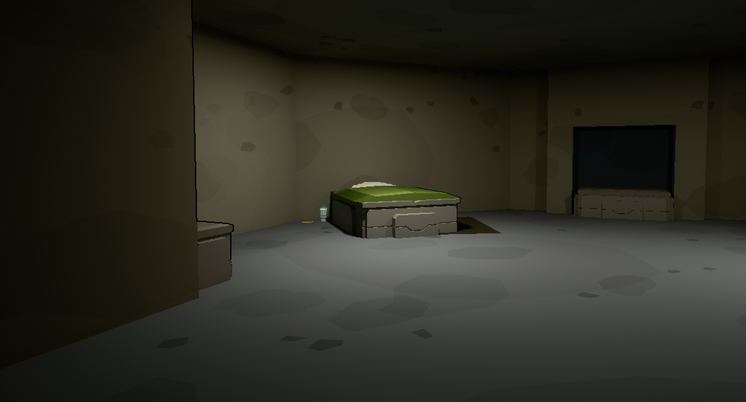
Reframing the Environment:
Turning around shows the player that the other key was beside the bed the whole time.
A bronze coin is placed next to it as a small reward for finding it. This sequence was built to try and emphasise that when the player sees similar locks in the game at later points, they'll need to explore the space to be able to find all the keys necessary to open the lock.
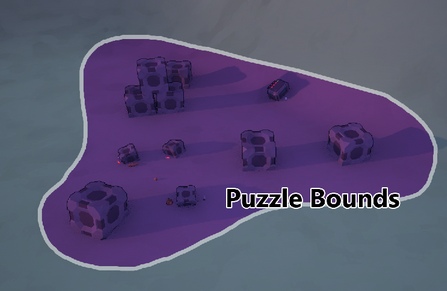
To make these small puzzles consistent, we made sure that they were created within the confines of the garages.
While trying to find where these should go, we found that similar puzzles in the environment showed that it was very hard to determine the bounds of where the designer of the puzzle had hidden the keys.
Exceptions to this rule were the harder "Fridge" puzzles placed into the world. These were visually different and were still kept within a set area of some kind, even if it wasn't always indoors. I helped give direction on the rules we should follow for these, but a different member made these while I was busy with the world / lighting / tutorial.

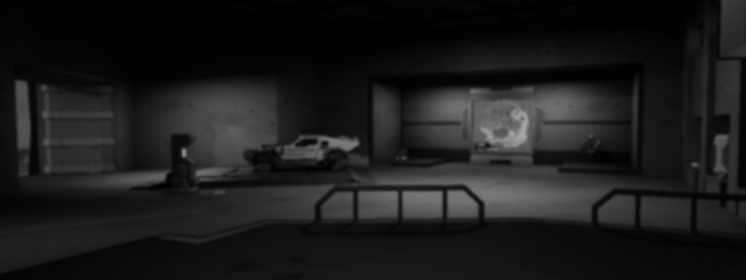
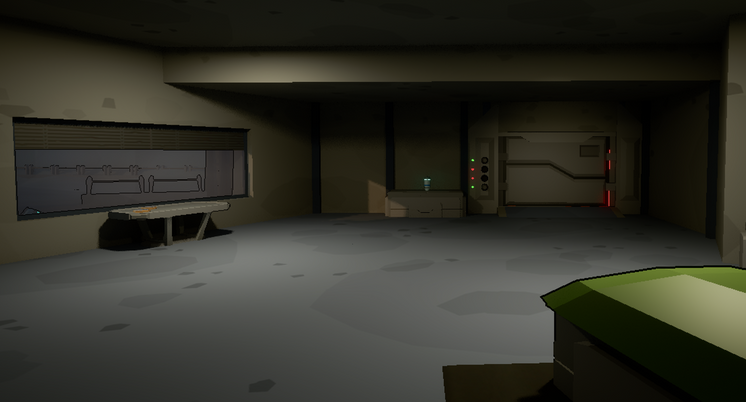
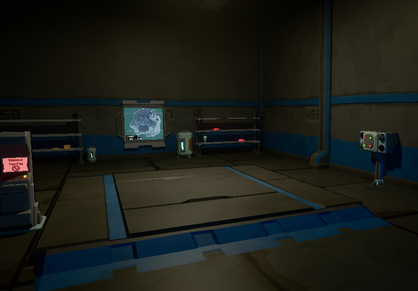
Entering the Garage:
As the door opens, there is a scaled up version of the map. This will update when the player finds and collects the relics around the world.
The car, with a box light shining inside to fake the exterior light coming into the room. I made sure to keep the ceiling dark to not pull focus.
The space is angled to try and build contrast between the grey walls and map areas I wanted to direct the players attention towards.
You also enter on a raised platform to gain a slightly better view, but to also clearly show where you came from when moving around the space.
Black and White + Blur Test:
I've found that if your elements are still legible when black and white and blurred, you're in a good spot.
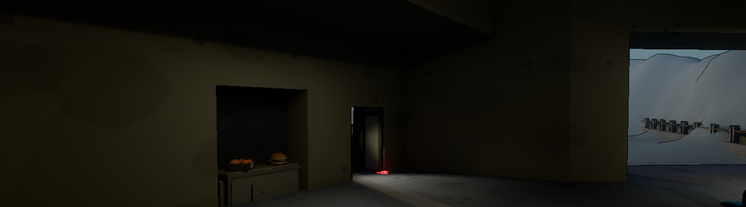
Exterior Route:
A similar effect was done to the door that leads to the snow section the player saw through the window.
This was my attempt to create a gated area that shows our Heat mechanic. The longer the player stays outside, the colder they get.
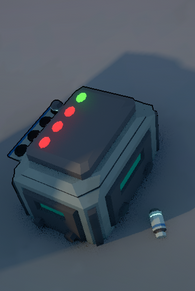
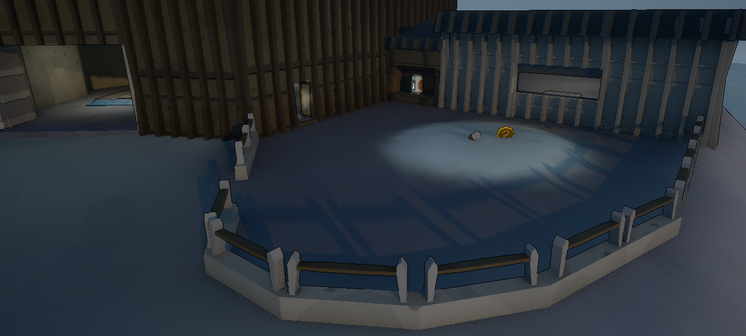
Gated Exterior Area:
The player is rewarded with the coin they saw earlier when they enter this space, along with some fuel for the vehicle.
It opens to the vista of the main level, but is gated to stop them going too far and leaving the car behind.
If the player dies from the cold, they return the bed at the start of the game. So if they do die here, there's not a long walk back.
Visual Development
Initial Exploration:
On the first day I spent some time modelling a quick road piece in MAYA to use on the landscape spline, then creating my landscape material so I could paint multiple surface types using a texture I quickly threw together in Photoshop.
I then spent some time setting up the landscape in Unreal, and making sure my mesh would work with the landscape spline system.
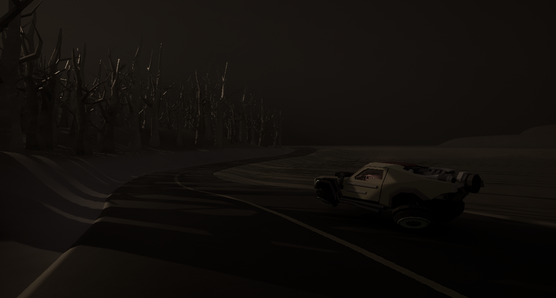
Lighting pass:
I wanted to dig into setting up a the lighting for this project, so dedicated a few days experimenting with all the settings I could find available to me.
Initialy I wanted to make it much darker and have the car use headlights to help them navigate. Setting up a night scene with light from the moon.
Brightening it up:
After sleeping on it I had some feedback from my teammates that asked if I could make it brighter since they were finding it hard to see, especially in darker areas like the forest. I tweeked some more settings and found this new baseline that I thought worked well.
The way I achieved this look was through the post process. Although this looked good, it was causing issues with our in world UI and needed to be adjusted.
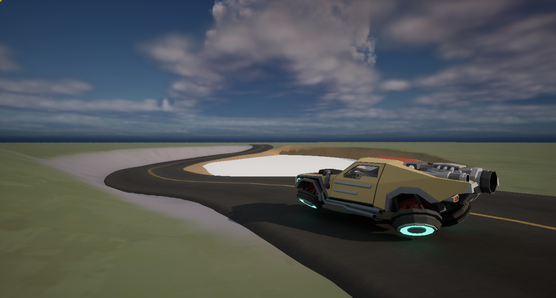
Terrain rationalisation:
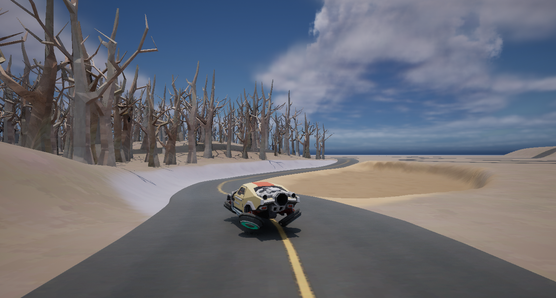
The project was built using an asset pack for elements like the vehicle, buildings and trees. I thought it was strange that the ground was so green when being covered in dead trees, so changed it to dirt instead.
This allowed me to have a darker area for dried out sections that'd help show you were driving through a dead land. We hadn't settled on what would keep you in your car, so were initially experimenting with it being heat from the sun.
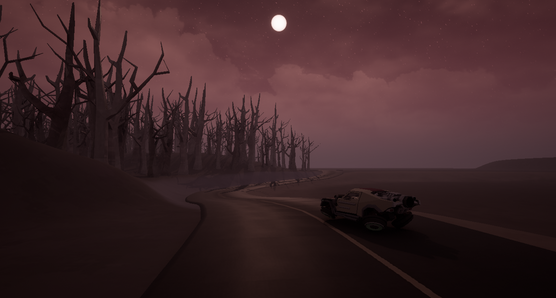
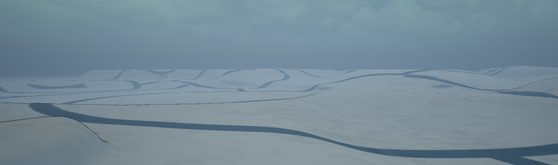
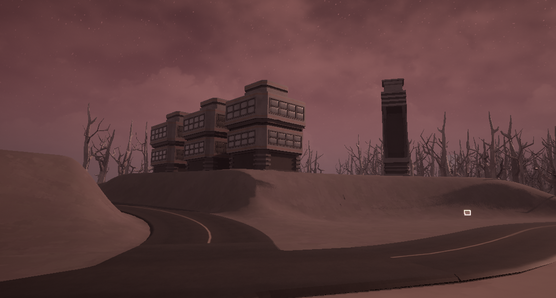
Achieveing something distinct:
I found when adjusting the skybox and fog, I got to a result I really liked the look of. Something very alien that felt distinct from other work I had done previously.
This inital pass was quite dark still. I iterated on this to brighten it up but keep the red sky look.
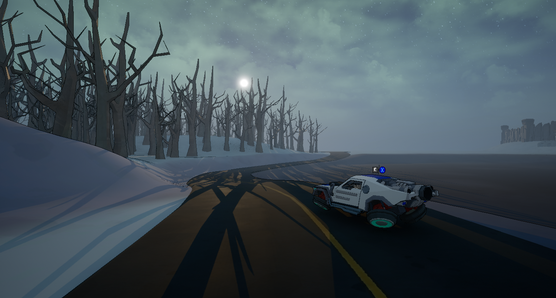
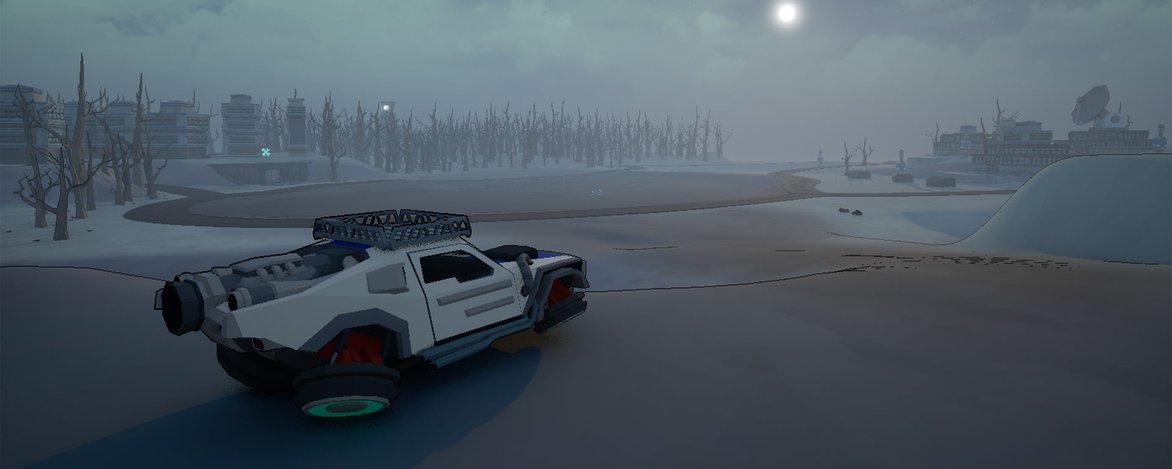
Post process and a cold snap:
After some discussion, another team member suggested flipping it to blue instead. At this point we hadn't nailed down why you took damage when out of the car either so this felt like a natural step to have the world reflect those conditions and "feel" cold.
I worked on that and after some tweaking of the landscape material and skybox colours, it came together into the icy tundra that we ended with.

Keeping things consistent:
One of the last changes to this was to make sure everything followed a consistent colour palette. This involved altering the materials on all the metals, structures and main player vehicle to keep to the colder blues and whites. This pass really helped tie everything together.


benwheatley98@hotmail.com